Print
clock clock iconcutlery cutlery iconflag flag iconfolder folder iconinstagram instagram iconpinterest pinterest iconfacebook facebook iconprint print iconsquares squares iconheart heart iconheart solid heart solid icon
A89BD958 4471 4BA2 8704 92D2729125AB 200x200 - Sugar & Spice Fall Leaf Cookies

Sugar & Spice Fall Leaf Cookies

  • Author: diana douglas
  • Prep Time: 1 hour 45 minutes
  • Cook Time: 10 minutes
  • Total Time: 1 hour 55 minutes + 3 hours rest
  • Yield: about 36 cookies 1x
  • Category: Baking, Desserts

Ingredients

Scale

Cookies

1 cup + 2 TBS unsalted butter, chilled to 60 degrees, cubed

1 cup granulated sugar

1 large egg

2 tsps vanilla extract

1 tsp cinnamon

½ tsp ginger

½ tsp nutmeg

¼ tsp cloves

tsps baking powder

½ tsp salt

3 cups all-purpose flour, sifted

Extra flour for surface

Royal Icing

3 lbs powdered sugar

¾ tsp cream of tartar

8 ¼ oz pasteurized egg whites

2 tsp vanilla extract

Gel food coloring

Decorating Supplies

Six piping bags

Piping tips in “outline” and “fill” sizes (about ⅛” and ¼”)

Chip clips, icing bag clips, or rubber bands

Bakell Tinker Dust and Sugar Sand, or preferred decorating toppings


Instructions

Make Dough

(make 3 hours to 2 days before baking)

Add butter, sugar, vanilla, baking powder, salt, and spices to the bowl of a stand mixer. With the paddle attachment, beat on medium speed until light and fluffy ~ about five minutes.
 
Add the egg and mix until smooth, scraping the bowl down to ensure all parts are combined. Reduce speed to low and add flour about one cup at a time until the dough is just mixed. Scrape bowl down as needed.
 
With your hands, pat the dough into a ball and then separate in half. Pat each piece into a fat disk, wrap in plastic wrap, and refrigerate for at least three hours, preferably overnight.
Roll Out and Bake Cookies
Preheat oven to 350°. Line two baking sheets with parchment paper.
 
Remove dough from the refrigerator to warm up about an hour before rolling out. Dough should still be chilled, but warm enough to knead without cracking. I can always tell it’s the right temp when a solid whack with the rolling pin gives the dough disk a nice round indent.
 
Knead each dough disk by hand two or three times to soften up. Form into a ball or log shape. I like to use a log shape and roll out a narrow sheet to fit between the rubber band guides I use on my rolling pin.
 
Dust your clean countertop or work surface and the rolling pin with flour to keep dough from sticking, and re-dust periodically if dough starts to tear or stick.
 
Use ¼” rolling pin guides if available. Working from center outward, firmly roll dough until it is ¼” thick. Cut out shapes as desired and lift to baking sheet with spatula. I find it works best to press in all the shapes, then gently lift each out at the end.
 
The excess dough from between cookie cutouts can be balled up and rolled out again up to two times. Any more than three roll-outs, and the dough is too over-worked to cut out nicely. (Pro-tip: if I still have extra, I will roll out a fourth time, cut into rough squares and cook along with the rest of the cookies, just to use as a cookie crumble topping for pie or ice cream!)
 
Bake for 10 minutes on the center oven rack, rotating 180° halfway through. Cookies should feel just firm to touch in the center but still look pale with only the slightest darkening at edges. Do not overbake! For years I overbaked cookies, until I finally had faith that they do set up during cooling.
 
Let cool on baking sheet for ten minutes, then transfer to wire rack to cool completely before decorating.

Make Royal Icing

(based on Julia Usher’s recipe available here, scaled up for our purposes)

In the bowl of a stand mixer, stir together the powdered sugar and cream of tartar by hand. Stir in the egg by hand until the sugar is moistened.
 
Using the paddle attachment, beat on low speed for about one minute. Scrape bowl down thoroughly. Increase the speed to medium-high and beat for about two minutes until the icing is pure white and thickened. Add the vanilla extract, scrape down the bowl, and beat for one more minute.
 
For using three colors of icing as shown here, scoop about 1 cup of icing each into six small bowls. Each color will be made in a stiffer “outline consistency” and a waterier “fill consistency.” For the three “outline consistency” bowls, add ¾ tsp of water. For the three “fill consistency” bowls, add 2 tsp of water. Stir thoroughly with spoon. For outlining, the consistency should be such that if you scoop a spoonful up it will fall off in blobs. For filling, the consistency should be such that a spoonful will drizzle back into the bowl in a steady stream and flatten out within 10-15 seconds. Add more in ½ tsp increments to achieve these consistencies.
 
Add gel coloring to achieve desired colors. I wanted a cozy, muted fall palette and stuck with three colors—any more I find unmanageable with the multiple icing consistencies! To achieve the shown look I used Chefmaster gel color in the following amounts: deep red = 12 drops Burgundy + 4 drops Buckeye Brown; forest green = 10 drops Teal + 3 drops Buckeye Brown; pale cream = 4 drops Sunset + 5 drops White. Experiment and find what you like best! For each bowl, apply the drops and stir thoroughly with a spoon.
 
Transfer each bowl of icing to a piping bag. I prefer to use decorating tips inserted into the plastic bags, but you can also just snip holes into plastic piping bags (⅛” for outline, ¼” for fill) and pipe directly from the bag with no tip. To fill the bag easily, I place in a large cup or mug, and roll the top of the back down to make it easier to pour in. Once the icing is in, close with piping bag clips, chip clips, or rubber bands. Trust me, do this carefully to avoid mucking up the bags—there’s plenty of time to make a mess later! (Pro Tip: For each bag, Sharpie “O” on the outline consistency and “F” on the fill consistency)
 
If you have leftover icing and have kids like mine who are super eager to help, I like to mix a bowl to a consistency right between outline/fill, and put it in a condiment bottle that is much easier than a piping bag for little hands to work with! I usually do ½ cup per color/bottle.

Decorate

For each leaf, outline holding piping bag at a 45 degree angle and holding the tip above the cookie so the icing can “fall” down into place. Then fill with your looser consistency. Use a toothpick to help spread the fill icing across the top of the cookie. Try a couple basic ones, and then you can get creative with different leaf patterns! I like to make some fully iced for those of us with a sweet tooth, and leave some with less icing to let the cookie flavors shine.

While royal icing is still wet and working over a plate or baking sheet, gently sprinkle with your Tinker Dust and sugar sand. I used Tinker Dust in Champagne Gold, Creamsicle, and Soft Olive, and Red Pearl Sugar Sand.
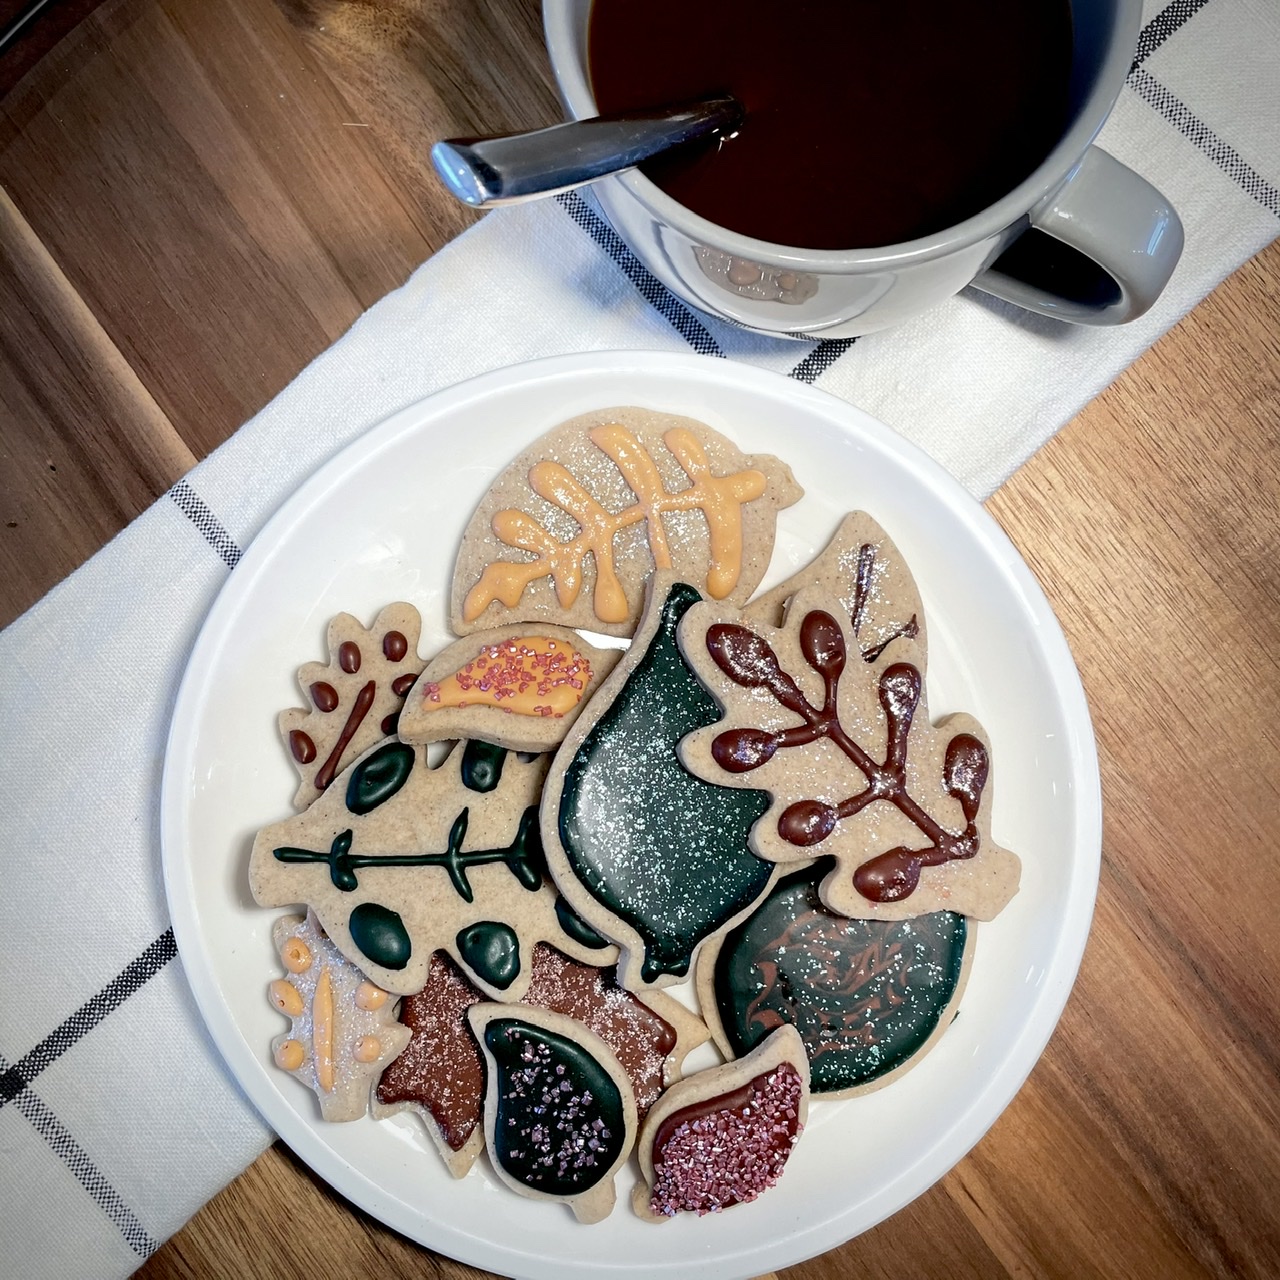
Leave to dry for at least five hours while icing sets.
 
Enjoy!
 
Plate of frosted leaf shaped cookies with a cup of cookie on top of a towel

Notes

NOTE 1: Store finished cookies in an airtight container for up to five days.

NOTE 2: Dough can be made in advance and frozen for up to one month; thaw in fridge till pliable before rolling out.


Keywords: Sugar & Spice Fall Leaf Cookies, Sugar Cookies, Autumn Cookies, Frosted Cookies, Leaf Shaped Cookies, Sugar Cookies with Frosting